Thursday, October 7, 2010

Kiwi carbonara

Faced with a chunk of ham that needed using, I went digging through my Edmonds book for a recipe. There aren't many ham recipes, really: I only had 2 to choose from. In the end I decided on spaghetti carbonara (p102) as quicker and easier than my other option, pizza.


It was a remarkably quick to throw together - just fry up some onion with chunks of ham (the recipe actually calls for chopped ham steaks), and throw in mushrooms. While that's cooking, mix an egg yolk into some sour cream. Add this to the pan, heat slightly, and the sauce is ready. Just add pasta and dinner's done.


Strictly speaking, it's not a proper carbonara - sour cream and ham steaks? Not exactly the traditional Italian version! The alternate name given for this recipe is ham and mushroom sauce: a more accurate description, really.


This kiwified version of spaghetti carbonara is cheaper and easier to make than an authentic Italian one. And it tastes pretty good, really: a creamy sauce, with big chunks of ham and mushroom - what's not to like? So if you're a fan of creamy pastas, this is a good one to keep in mind, especially if you need a meal in a hurry.

Tuesday, October 5, 2010

Erroneous pie

I'd often wondered about the difference between cottage pie and shepherd's pie. After all, they seem pretty much the same. I had a vague theory around the American vs British English theme, but nothing to back it up. As far as I'd ever been able to determine, cottage pie and shepherd's pie were one and the same thing.


Then, one day, leafing through my recently acquired Joy of Cooking (thanks, Bryn and Liz!), I unexpectedly came across the solution. According to this great repository of cooking knowledge, cottage pie is made with beef; shepherd's pie with lamb. And when you think about it, it makes sense: what kind of meat would a shepherd have access to? Not beef!


So if we accept this definition, the Edmond's shepherd's pie (p129), along with every shepherd's pie I've ever made, is in fact a cottage pie. It would never occur to me to make one with lamb.


Whatever you call it, it's still a nice warming dish on a cold evening. Despite the sunny blue skies we've been having lately, it's still chilly out walking in the wind, and I was looking forward to my dinner. I got the spuds on to boil, and reached into my cupboard for an onion: there weren't any.


Since onion is quite an important ingredient, I had to turn off the potato pot, put my shoes back on and go for another walk. (The upshot of this was that I well and truly passed the 10,000 step mark for today - 12,956 at last count). After exchanging jokes with the checkout chick at my local Supervalue about the unruly onion which wouldn't sit still on the scale, I arrived home at 7.40pm to begin my pie for the second time.


I'd never made 'shepherd's pie' from a recipe before. I usually just cook up some mince with tomatoes and stuff, then stick it in a casserole dish and top it with mash and cheese. While this recipe wasn't far off my usual technique, there were some differences.


You begin by cooking the onion and browning the mince. Pretty standard so far. Then you stir through some flour before adding stock, tomato sauce and chutney. This is where I came unstuck. Clearly the flour was important for thickening the gravy around the mince, but I overlooked it, and had already poured in some of the stock before I noticed. Luckily, I had more stock than I needed, so I poured it off and started again from the point where you stir through the flour.


With all the ingredients included, I left the filling to simmer while I sorted the potato topping. The instructions were to mash the potato before stirring in butter, finely chopped onion, and grated cheese. I was a bit dubious about the onion, so I chopped it as finely as I could before adding it.


With the mash done and the filling nicely thickened, it was time to assemble my pie. I was interested to see that an actual pie dish was to be used - I've always done mine in a casserole dish. But as with Edmonds' fish pie supreme, using a pie dish gives the recipe a better claim to the name of 'pie'.


With the mash spread over the filling, and cheese sprinkled on top, the pie went in the oven. 20 minutes later, it came out golden, slightly crunchy around the edges, and oozing gravy here and there. Looking at it made me feel even hungrier, so I quickly helped myself to a decent portion.


It was worth waiting for, too. The filling had a nice thick consistency with no watery juices oozing out, and I liked the zing of the chutney. The topping was nicely savoury with added cheese and onion, and the odd crunchy cheesy bit on the edge was extra nice.


You really can't beat a good shep...ahem...cottage pie. It's one of those all-time favourites. Cheap, easy, homey comfort food. I'd choose this over something fancy every time.

Sunday, October 3, 2010

Caramel combo


I begin this entry with a slight sense of déjà vu: a few weeks ago, I wrote about taking pecan pie to a pizza night at Lauren and Tom's. Last night I was once again invited to partake of Tom's fabulous pizzas, and again offered to supply an Edmonds dessert.


This time, I selected honey cake (p49), along with its recommended accompaniment, caramel sauce (p189). This recipe can be used either as a cake or a dessert, but I liked the dessert idea, so I'd set this one aside until I had an excuse to make it.


The recipe begins with heating honey, water, butter and chopped dates together in a saucepan. When the butter is melted, you take the pan off the heat and leave it to cool. After a few minutes you can add vanilla and mix in the dry ingredients. That's all there is to it: pour it into a cake tin and bung it into the oven.


The cake takes 45 minutes to bake - I set the timer for 40 and sat down to finish my book. When the timer went off, I brought out the cake to do the skewer test. It was already looking worryingly dark on top, but my skewers were still coming out a bit gooey-looking. I stuck it back in for the final 5 minutes, placing a piece of baking paper on top in the hope that it would protect the cake from further browning.


Meanwhile, I made a start on the sauce, heating sugar and butter together in a saucepan. For a moment I was harking back to my near-disastrous attempt at nut toffee: stirring and hoping the sugar would dissolve before the mixture started boiling. It did - perhaps brown sugar dissolves faster than white. Once it had, I let the mixture boil for 3 minutes then took it off the heat.


In a jug, I dissolved cornflour and golden syrup in a cup of warm water. This mixture went into the saucepan, (where the butter/sugar mixture was fast setting into a solid sugary mass) which then went back onto the heat to boil. Initially the two mixtures refused to combine - I had chunks of the sugary stuff floating in the milky-looking cornflour water - but by the time I had reached boiling point, I had a smooth-looking brown sauce.


After 2 minutes on the boil, I took the pan off the heat and added cream, turning a sweet and sickly sauce into something creamy and moreish. I had, in the meantime, removed the cake from the oven and left it to cool slightly in the tin. But as soon as the sauce was ready, I poured it into a jug, packed up the cake and headed off to Lauren and Tom's.


Most of the people Lauren had intended to invite were unable to come, so in the end there were only 4 of us. That didn't matter: we had a few laughs chatting around the dining table, listening to Tom's eclectic assortment of old records while he cooked up his pizzas.


With that dinner party favourite, Songs that Built Australia, playing in the background, we polished off the pizzas. There's nothing like a little Waltzing Matilda to enhance your enjoyment of a meal. With the pizza dishes cleared away, we cut into the cake.


It was necessary at this point to introduce Tom's Scottish mate Keith to the wonders of New Zealand's favourite cookbook - if only to convince him that I wasn't insane, and actually had a reason for taking photos of my food..


It was quite a good cake, really. I always enjoy anything that has dates in it, and the caramel sauce went really well with the honey/date flavour of the cake. It was very sweet, though, and I found it difficult to get through my whole piece. If you have a sweet tooth, this one's for you.


The cake was also a little dry - definitely overcooked, and reheating (even briefly) won't have helped. It's probably best taken out at the 40-minute mark or earlier, then served warm from the oven. Luckily, we had the caramel sauce to give it a bit of moisture. I wouldn't have liked to eat this cake without the sauce or something similar.


So if you've got a hankering for something sweet, have a go at this. It's pretty easy, just be careful not to overcook the cake - I think it'd be better to undercook it than dry it out like I did. After all, no one minds a little stodginess in a warm pudding. The caramel sauce is a bit more involved, but it's not really difficult - after all, I managed to do it!

Wednesday, September 29, 2010

The pros and cons of spontaneous silverside

I pulled out an old favourite last night: corned beef (p124). Since I've only ever cooked silverside in my crockpot, I was interested to see how the stovetop recipe described in my Edmonds book would compare.


The benefit of this version is that there's no pre-planning required. I decided to cook it yesterday afternoon, got it on the stove immediately and had it cooked in time for dinner. If I use the crockpot, I have to get it ready in advance.


The method is pretty much the same, though: when you've got the silverside in a pot, add a bay leaf, peppercorns and golden syrup, and just cover with water. This recipe also includes parsely and a strip of orange rind - things I don't usually include.


The pot I chose was a bit small, really. When I'd added the water, it nearly reached the top of the pot. I'd chosen the smallest piece of silverside from what was available, but it was still slightly larger than the 1kg silverside indicated in the recipe, meaning I'd have to cook it slightly longer.


Anyway, I brought the water to the boil, and left the corned beef to simmer for a bit over an hour. As I approached the end of this time, I made a start on that most vital accompaniment, mustard sauce (p187). This simple condiment is the real reason why everyone loves corned beef. Who eats corned beef without mustard sauce?


You'd have to be pretty lazy not to bother with the sauce: it takes about 30 seconds to combine the egg, sugar, flour and mustard, then maybe another five minutes to gradually add the liquids, (vinegar and cooking liquid from the beef) and heat it until thick. Dead easy, very quick, and such a yummy addition to the beef.


The beef itself was fairly disappointing.  I found the stovetop version is quite tough, compared to the tender, falling-apart results I get from my crockpot (Mum gets hers even better than mine; I don't know how, since we do it exactly the same way). It's still got that great corned beef flavour, though, and you can't fault the mustard sauce.


So while cooking your corned beef on the stovetop is quicker, and requires less planning, I'd still recommend using a crockpot. The good news is, there's no reason why you can't use this very Edmonds recipe in a crockpot - just leave it in for 8-10 hours instead of one. But however you cook it, never go without the mustard sauce!

Monday, September 27, 2010

Worth the wait

Well aware that I've been a bit lax in my blogging lately, I dragged out my Edmonds book at work today to plan some meals for this week. I ummed and ahhed and finally settled on having steak this evening: while the steak itself isn't an Edmonds recipe, it's a good excuse to make mushroom sauce (p186).


You couldn't have paid me to eat mushroom sauce 10 years ago, but tastes change - I quite like mushrooms these days. And since I hadn't cooked much with mushrooms before this year, each mushroom dish I come across is new and interesting.


Just steak and mushroom sauce by itself is not a meal - I needed veges. There's plenty of quick and easy vege in my freezer, but why not take the opportunity to knock off a recipe from the vegetable chapter as well? After some perusal, I decided to have a go at cooking beetroot (p158).


With a couple of stops on the way home, I supplied myself with the necessary beetroot, mushrooms and a piece of porterhouse. Of course, by the time I'd got home, put away the groceries, watched Masterchef and gone for a decent walk, it was nearing 7pm before I could even make a start on my dinner.


Which wasn't the best, considering I was cooking beetroot: they take 30-60 minutes to cook, and I had to get this done before I could make a start on my steak. Having cleaned the beetroot and put them on to boil, I pacified my complaining stomach by feeding it an early dessert - a little Greek yoghurt with honey and walnuts.


The beetroot were on the stove for 50 minutes before I was convinced they were properly cooked - since this is the first time I'd cooked beetroot by boiling them, I wasn't certain what they were supposed to look like when they were done. The next step was to rinse the beetroot under cold water, then "slip the skins off". Sounds easy enough, doesn't it? So I thought until I found the skin flaking under my fingertips, the beetroot slipping around and splattering bright red juice all over the kitchen..


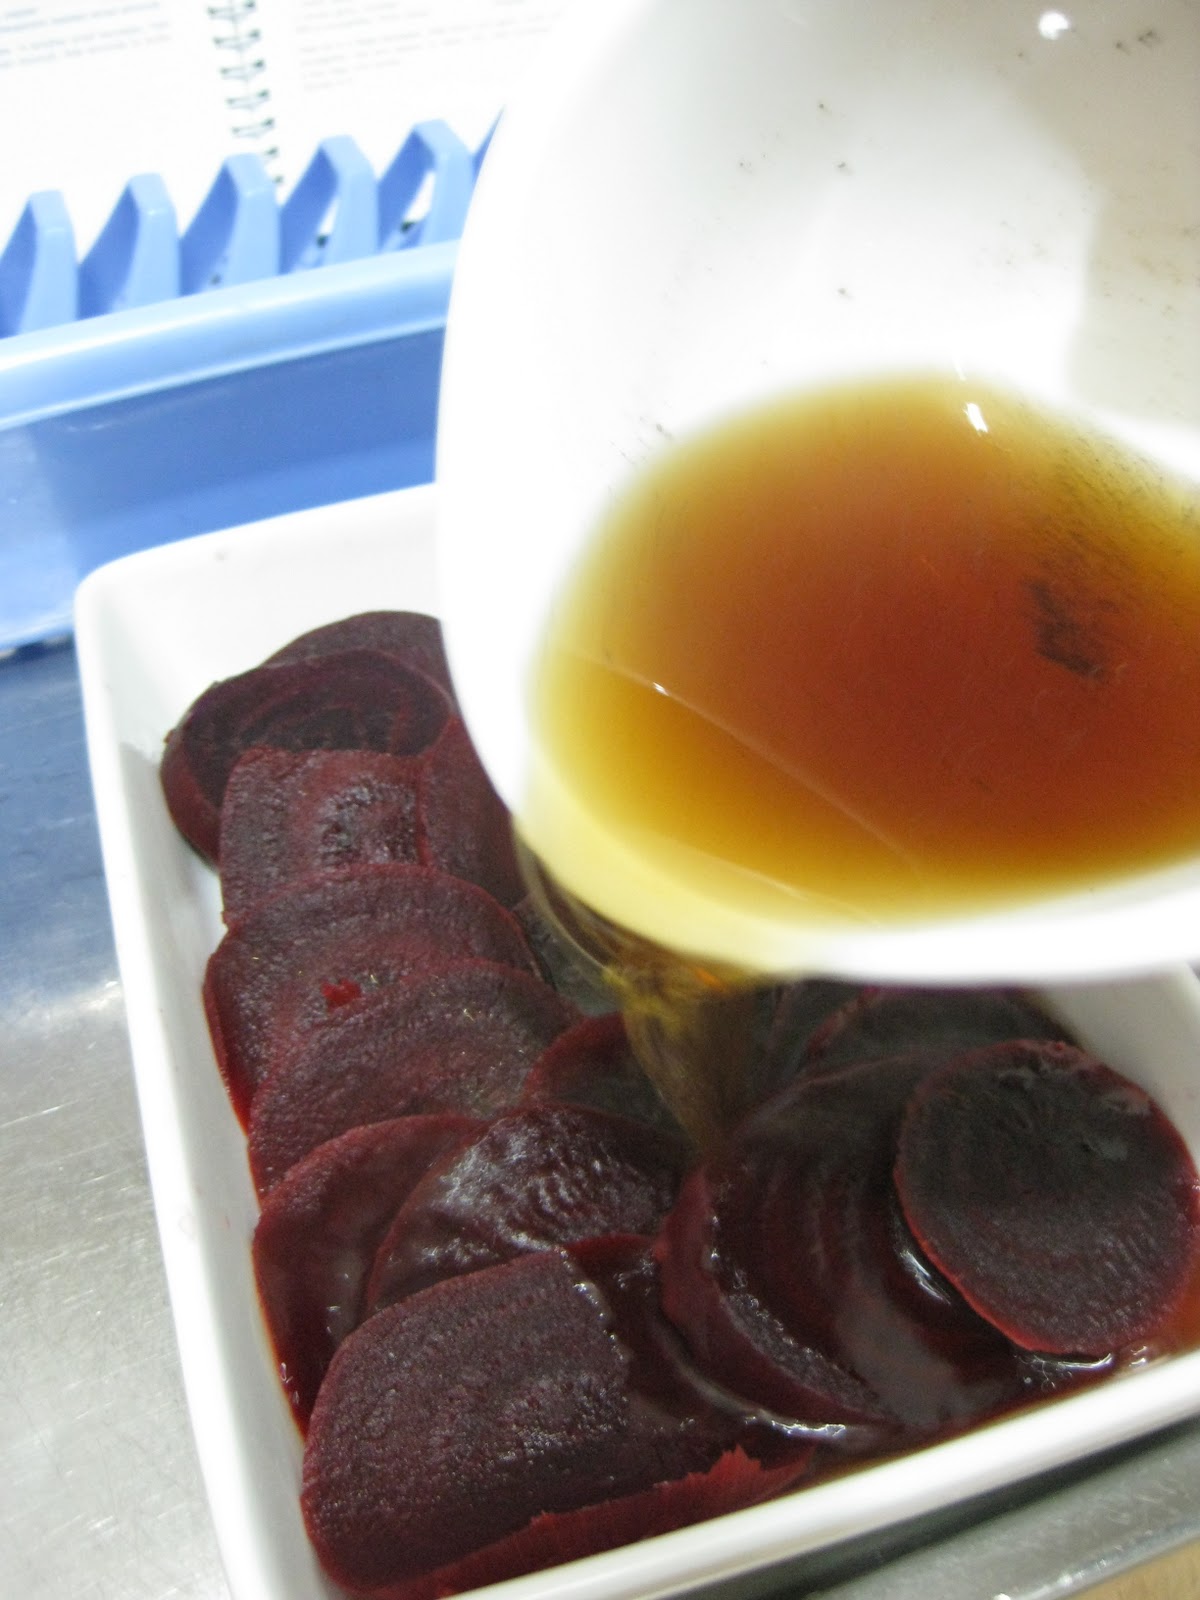
Eventually I had the skins off, and sliced the beetroot, placing the slices in a dish. I then mixed up the dressing: sugar dissolved in boiling water, mixed with vinegar and seasoning. When I'd poured the dressing over, I put the dish into the fridge to cool, and made a start on the mushroom sauce.


The sauce was very straightforward: cook sliced mushrooms in melted butter, then the now-familiar process of stirring in flour and gradually adding milk to make a thick sauce.


While the sauce was cooking and the beetroot chilling, I saw to the steak - a process I don't excel at, but am able to produce a result satisfactory to my own undemanding tastes. I let the steak rest while I cooked up some beans from the freezer, then - finally, at 8.25pm, I had my dinner ready.


I was pleasantly surprised at the beetroot - it had a mild sweet and sour tang to it, and more texture than the canned beetroot we're all familiar with. True, it's probably not the best to be pouring a sugary syrup over your veges, but the beetroot itself has got to be pretty healthy - packed with antioxidants if that rich, dark colour is anything to go by.


Hang on, I'll check Google ... yep, antioxidants for Africa. And other stuff, but you can do your own Googling if you're interested. Health benefits or otherwise, it was tasty, and I'll probably make it again.


As for the mushroom sauce, it was deliciously creamy, very filling, and went well with the steak. I'd usually be just as happy to eat the steak by itself, but I quite enjoyed the variety of a sauce. It's easy to make - have a go sometime.


So here I sit, pleasantly full of steak, mushrooms and beetroot, but well aware that as soon as I finish this blog entry, there's a kitchen full of dishes awaiting me. Never mind, it was worth it.

Thursday, September 23, 2010

Sultana cake: take 2

During the six-odd months I've been doing this challenge, there have been a few dishes that were absolute disasters. With most of these, the recipe wasn't at fault: it's just that sometimes I'm a total muppet.


A standout example of the muppet phenomenon is my attempt at sultana cake (p59). It's a very straightforward recipe - assuming you remember to put in the baking powder.


On my list of disasters and could-be-betters, there are a handful that I am determined to have another go at. These are the ones where I have a clear understanding of where I went wrong, or I have a theory of how the recipe could be improved. So, from time to time, I'll put up a 'take 2' of a recipe I've already done.


For my first 'take 2', I selected one of my most obvious blunders: the sultana cake incident described above. My original intention in making this cake was to compare the result with my Oma's sultana cake recipe - a particular favourite of mine. When compared to the gluggy horror I produced, Oma's recipe was the clear winner. But what about if I did it properly?


The two recipes are fairly similar, with only a few proportional differences in ingredients. Also, Oma's recipe uses both lemon and almond essence, whereas the Edmonds version specifies either one or the other.


As with Oma's recipe, I began by boiling the sultanas in water, then (having drained the water off) adding butter. I used canola spread in place of butter here - I've recently formed a theory that spread works even better than butter in some cake recipes. Anyway, I'd run out of butter, so I had to hope that this recipe was one of them. My quantities for the spread were approximate, to say the least: I still haven't replaced my kitchen scales, and a tub of canola spread doesn't have convenient cutting marks on it like a block of butter!


While the 'butter' was melting in with the sultanas, I beat up the eggs and sugar. This done, I tipped the contents of the sultana pot into the egg mixture, along with the almond essence. Then, the dry ingredients: crucially, I remembered to put in the baking powder. Once these were mixed through, it was time to get it into the oven.


The cooking time given is 1 - 1 1/4 hours. I checked the cake after one hour, and found that, while the top was unusually firm and crisp, the centre appeared completely uncooked. I put the cake back in for another 1/4 hour, but the centre was still gooey when I checked it. In the end, the cake had baked for a full 1 1/2 hours before I was satisfied. Naturally, Oma's recipe says an hour and a half!


Having let the cake cool down, I cut into it and had a taste. So how does it compare with Oma's version? Not favourably. The texture is crumbly, but I admit that this might be the result of my canola spread substitution. Even if you set that issue aside, it's also a bit lacking in flavour, and just isn't as packed full of sultanas. It's not quite a case of "you have to take a bicycle to get from one sultana to the next" (a delightful Dutch saying of Oma's) but they're more sparse than I'd like.


If you haven't tried Oma's version, you'll probably like this one well enough. But if you're going to make it, I'd recommend that instead of the 1/2 teaspoon of almond or lemon essence, use both. And while you're at it, up the quantity: Oma's recipe has 2 teaspoons of almond essence, plus a teaspoon each of lemon and vanilla. It may seem like a lot, but trust me: Oma definitely knew what she was doing!

Tuesday, September 21, 2010

Deep-fried and dangerous

On Sunday afternoon, I still had a large amount of leftover chicken that needed using. I knew of one recipe in the Edmonds book that required cooked chicken: chicken croquettes (p136). I hadn't been overly eager to do this one, as I'm not terribly keen on deep frying. However, there are a few deep-fried dishes in the book, and they all have to be done sometime.


The first thing to do was chop up the chicken in the food processor with some onion and garlic. Then, I made a white sauce base and added a bit of chicken stock, as well as some lemon juice, parsley, and an egg yolk. The chopped chicken mixture went in last, with a bit of seasoning.


I was supposed to spread this mixture in a separate dish and leave it until it went cold, but I wasn't about to dirty another dish for no reason, and the mix cooled down very quickly in the pan I was using. By the time I'd tidied a few things away and wiped down the bench, it was ready to use.


I put a pot of oil on to heat and began to shape my croquettes. The mixture was very soft and difficult to work with, but eventually I had eight reasonably neat cylinders ready to go. These needed to be dipped in beaten egg white and rolled in breadcrumbs, a fiddly little task that resulted in my croquettes being considerably more misshapen than before.


I managed to tidy them up, however, and was soon ready to begin frying. The oil had been heating for some time, so I was pretty sure it would be hot enough. When I lowered my first batch into the oil, I found that it was actually too hot - after the initial bubbling had died down, the croquettes had already turned dark brown and burnt-looking, despite the fact that they hadn't been in the oil for anything like the 5 minutes' specified cooking time.


I left them in for a little longer to make sure the chicken was heated through, then fished them out and set them in a paper-towel-lined colander to drain. I'd turned down the heat, so the second batch of croquettes looked a lot better than the first.


I threw together a salad while the croquettes were draining, and served myself a couple from the good batch, and one from the slightly overdone batch.


They were quite tasty (especially the ones that weren't overdone): nice and crisp on the outside and sort of hot and melty in the middle. I don't think I'd bother making them again, though. Setting aside the fact that deep frying is possibly the unhealthiest way of cooking anything, it's just not worth the effort and the mess! My kitchen was covered in dribbles and splatters of oil, and there were breadcrumbs, flour and smears of egg white and chicken mixture everywhere.


I wouldn't want to discourage you from trying these if you want to have a go - like I said, they're quite tasty, and they're a good way of using up leftover chicken. It would be easier (and perhaps less messy) if you happened to have a proper deep-fryer. Just bear your arteries in mind and don't eat too many!

Popular posts this week